
Something elsewhere on the board attracts your attention, in the game we were just discussing. You run it past me.
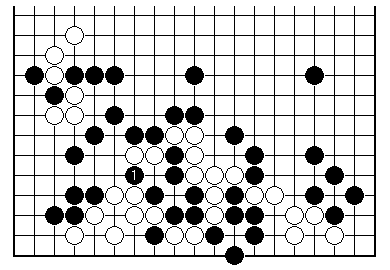
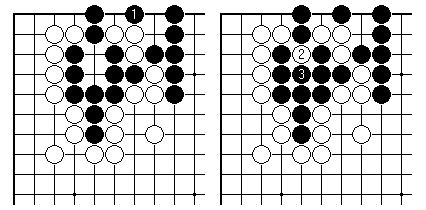
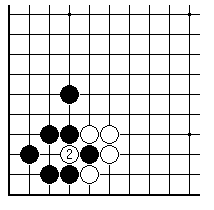
"You said these black stones were dead as they stood. But what if Black tries to come out this way?"
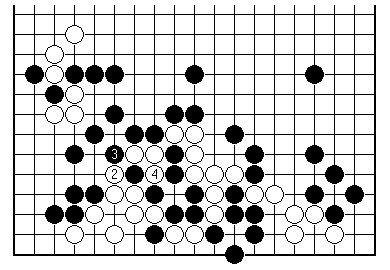
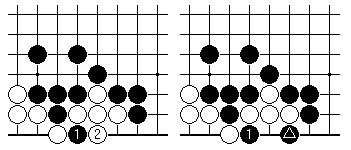
And you show me this sequence. Black 1 answered by White 2, then Black 3 threatens White, who therefore captures one black stone with 4.
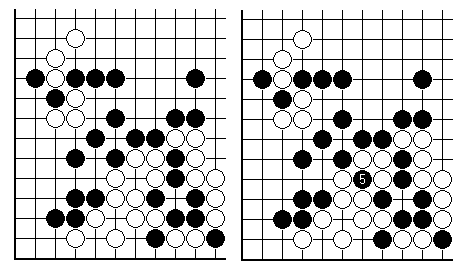
That leaves the position on the left. Black can recapture, as in the right-hand diagram, taking three white stones. This would gain freedom for some of the trapped black group.
Well spotted indeed! This tactic, known to go players as a snapback, is usually hard to see coming. It is simple enough when explained as a capture followed by an immediate recapture. The characteristic of the snapback is that the capture of a single stone leads to the recapture of more than one stone. There is no overlap with the ko concept: a ko involves the capture of a single stone, by a single stone that may potentially be retaken.
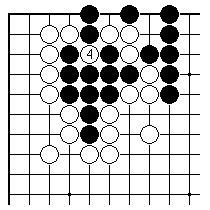
Snapbacks are an exciting tactic to master. But first let me reassure you that the players had in fact analysed the position.
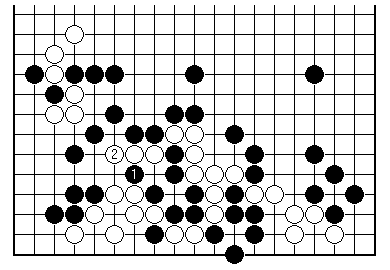
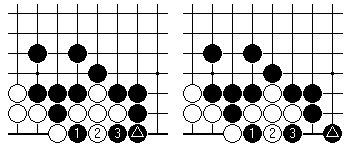
The correct way for White to answer Black 1 is with this careful choice of play 2. Then the danger passes.
Falling into snapbacks is a hazard for the unwary, especially those who can't imagine their opponent sacrificing even one stone (perhaps because they have trouble letting their own pieces go). Let's look at a range of examples.
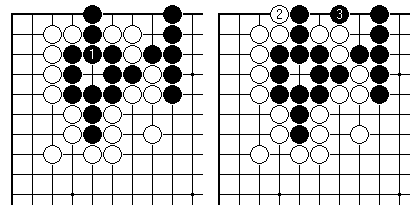
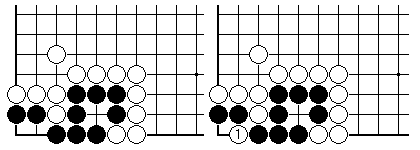
There is a capturing race inside Black's group. However Black should remain calm. Playing immediately at what appears to be the key point on the edge, as on the top-left, is a big failure. After White 2 and Black 3, the snapback pattern is revealed (left-hand diagram).
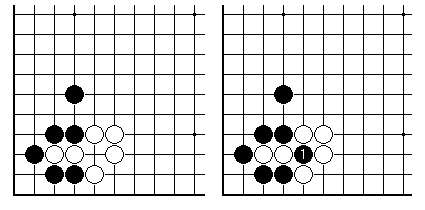
Black should have secured an eye by immediately connecting as shown here. Then there is nothing White can do. As shown, White fills an outside liberty but Black wins the fight by playing on the edge.
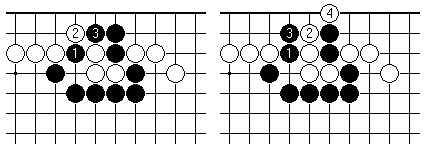
Here Black can break through on the edge, making good use of two lost stones. White's answer 2 in the left-hand diagram fails to Black 3, making a snapback. So the right-hand sequence is expected, in which Black 3 is possible because White has too few liberties to cut off the two black stones.
Advanced warning of snapback tactics comes from recognising the factors from these two examples (loss of eye shape, shortage of liberties) well ahead of time. Both are undesirable in themselves; but until the principles underlying them are thoroughly internalised it can pay dividends to scan the board frequently for potential snapbacks.
The edge of the board is a constant source of possible tactics. Here it is the case that a black stone sacrificed as shown in the top left-hand diagram leaves White a false eye, not a real one. The top-right diagram along shows how that sacrifice may perform as a snapback, in the presence of the marked black stone. This isn't really abstruse, but should be considered as one of a family of positions in which the false eye can be exploited (bottom diagrams - on the right Black's marked stone helps set up a ko for the capture of the white chain).
Finally on snapbacks an example in the corner. Black's group may seem to be safe. But White 1 will capture black stones, in a snapback you should by now be able to visualise, leaving a dead group having just one eye.
One last thing while I have your attention. Here is a capture and recapture, but with nothing to do with snapback, nor ko. Black needn't hurry to play 1, and White has no pressing reason to defend against it.
First published 13 April 2000 as On Your Side on MindZine,
Go Learning
© Charles Matthews 2000.