
| Go Articles |
| |
| Setpiece Kos |
This article in the series is mainly about immediate connection in a ko caused by a ponnuki capture.
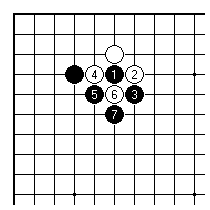
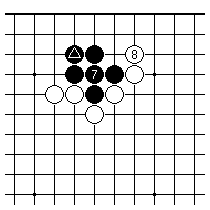
For example here Black 5 is a bad idea. After 6 and 7 there is no real need for White to fight a ko.
White simply connects. Black is left with weak shape (three cutting points).
If we consider the typical ponnuki connection with the marked stone in tally terms (Concept A in these articles) we count it as BBBBB versus WWWW, or B. A ponnuki means White has been captured at the point where Black connects. Considering this tally, Black hasn't paid a high price for such good shape. Compare this with the bulge kos of the previous article. There the same final shape would imply a tally of BB (to put it another way, it costs Black ignoring a ko threat).

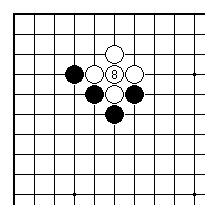
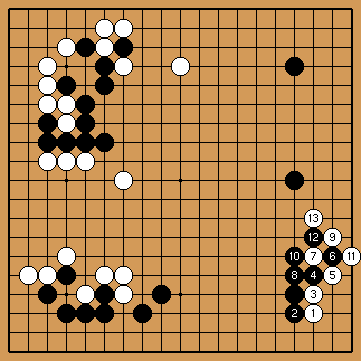
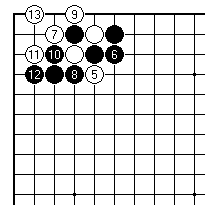
This is a quite normal 3-3 invasion sequence. In professional games Black now often tries to take sente, rather than recapture the corner.
To do that properly, Black plays 10 and then assumes Black 12 will force the ponnuki connection. After that Black's intention is to play elsewhere. Just playing 10 and then tenuki makes it too easy for White to get up onto the fourth line.
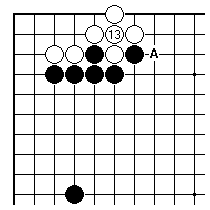
According to the book White does now connect at 13, for the end of the joseki. There are however many experiments in pro games where White either omits the connection, or plays atari at A instead which will provoke Black into capturing the ko. One has to understand the solid connection as the proper move here, and anything else as endangering White's shape, while making Black's wall harder to attack in any hard fighting. Omitting it has become popular over the last couple of years.
White 13 challenges Black to capture. Where are the
threats that make sense in relation with Black's
framework across the bottom side?
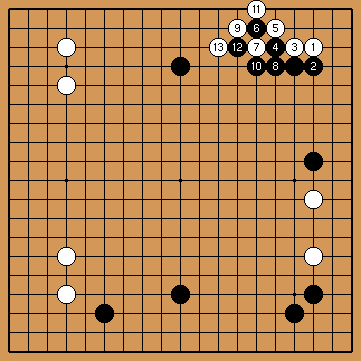
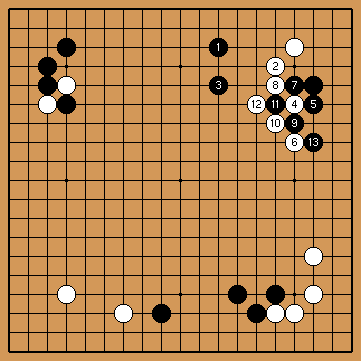
White 15 is a typical answer when Black takes the ko: important both for shape and territory. Black 16 is preparatory.
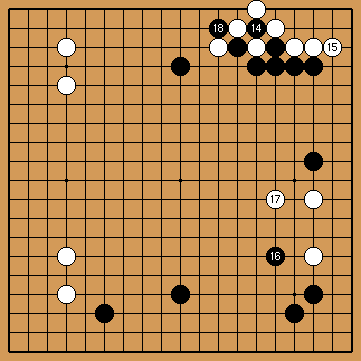
Black 20 as a threat aims at involving the whole board position (Miyazawa is a highly aggressive player). Clearly White does well locally with 21, but you could say that White 17 is just as much wasted as Black 18 becomes. The game will be decided by the large-scale fight after White invades with 37.
White's intention with 13 here is to return to an attack
on Black in the upper left.
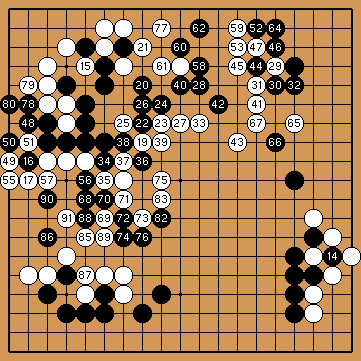
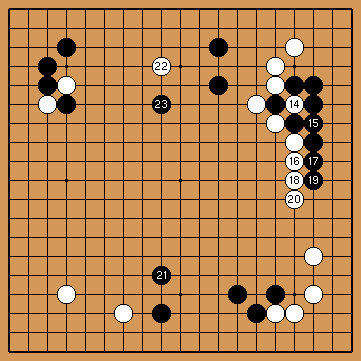
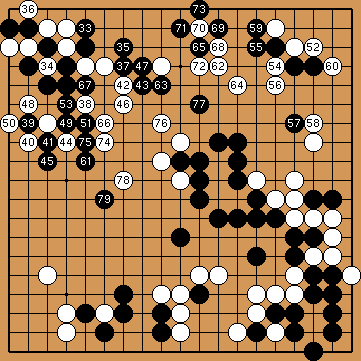
Black 18 connects the ko. 54 takes in ko at 16. 63 takes in ko at 29. 81 in ko at 51, 84 retakes. White pushes Black hard, but when Black resigns at the end here he could of course live by connecting the ko on the left edge. Doing that would mean White plays first in the lower right, Black's internal plays such as 86 having failed to give White shortage of liberties.
It is good to be able to identify quickly kos that will not be fought out. The serious analysis of ko fights by evaluating the stock of threats is time-consuming in most cases, so that any reasoning which bypasses it is valuable in a practical sense.
Sometimes it is obvious that one side can lose more than the other in the fight, and you can normally then assume that side backs down quickly. These are the so-called picnic kos.
There is a substantial class of kos to which the same sort of reasoning does apply, if you assume strategic consistency. That is, contesting the ko would go against sensible direction of play.
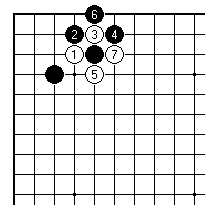
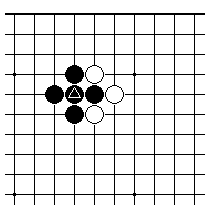
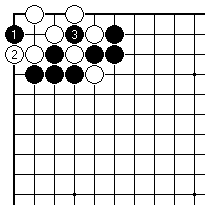
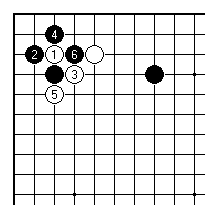
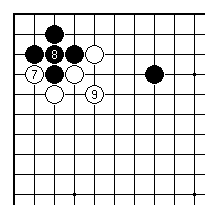
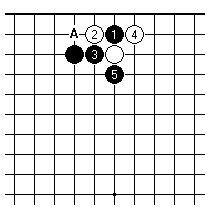
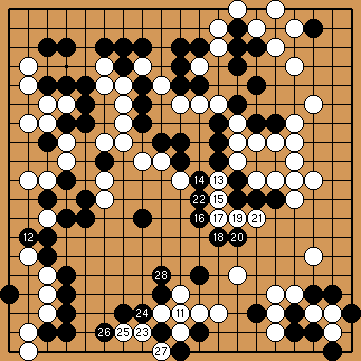
Black 2 is a possible answer to White 1, in case Black is strong enough locally to attack (meaning there would be more black stones than the diagram shows). Then White should cut with 3 as a way to make sabaki. If Black answers 5 with the ponnuki 6, rather than playing at 7, we'll get this position.
At this point in the sequence Black really must connect at 8, rather than trying anything more superficially aggressive. Black 8 leaves White open to attack - White has a light resource at A, but the game might go many ways. The point is that if Black tries to fight a ko at 8 Black's shape suddenly looks very vulnerable. Assuming that Black 2 of the previous diagram was correct for direction, Black 8 is simply consistent.
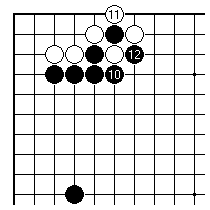
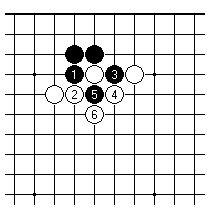
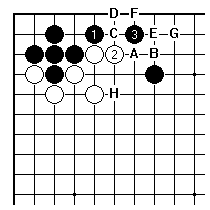
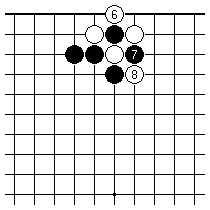
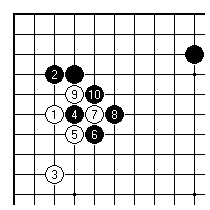
If Black has a good supply of ko threats, it might be better to avoid the ponnuki variation with 6 here. If White attempts 7 Black 8 is a conceivable way to play in the hope of killing the corner. After White 13 it will be ko. We now spend one diagram on a typical technical matter.
Black should think about how to start this ko. Playing 1 for 2 is better than playing atari at 2, White at 1. The point here is about White's possible gain on winning the ko: White connecting at 3 to live is relatively harmless, compared to White's capture on the edge.
The same type of direction-of-play consideration can be applied when defending.
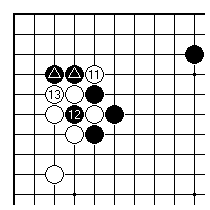
Suppose Black here is mainly concerned with making life for the group.
Then it makes sense for Black to play 7 on the third line this way, rather than connect; and to accept the chance to play 9 rather than fight the ko. Then the ko becomes relatively unimportant.
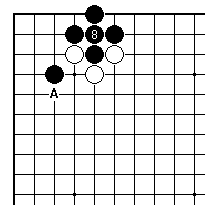
Black can connect with 7, but that rather assumes that Black will be able to attack making use of White's cutting points. It also makes the marked stone into redundant shape. Mostly this way of playing is unreasonable.
Here Black 5 is inherently heavy.
By connecting patiently at 15 Black manages life in sente on the edge. With 21 preventing an invasion and the cap 23, the game looks promising for Black.
This is an important pincer joseki. White 1 is the direct way to try for eye space and life. If Black 4 is playable (as is the modern verdict) White ought to try the other order (White at 3 before 1), even though that can lead to a complex variation when Black answers at 1.
This is the standard continuation. It is recognised as good enough for Black. The ponnuki connection at 8 is now considered the only play.
There are shape reasons, to do with the precise placing of the pincer. Black has this follow-up sequence, which may be played immediately. It works well because (i) the continuation White A Black B etc. where White cuts isn't so great when Black H puts White into bad shape, and (ii) White A Black E isn't so bad for Black. This diagram must have had an important role in the popularity for many years of the two-point high pincer.
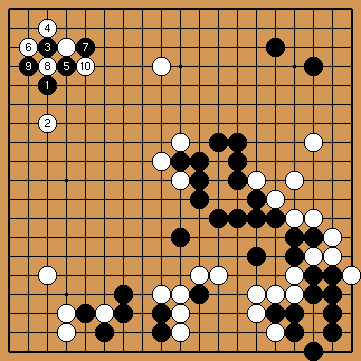
White 10 is to make the most of White's local strength.
It initiates some very difficult fighting.
16, 19, 22, 25, 28, 31 in ko. White 26 here is an important play with a good feel, which in a ko threat is significant. Go Seigen on peak form.
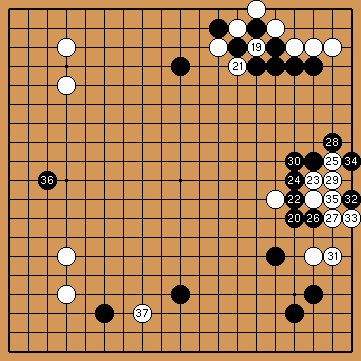
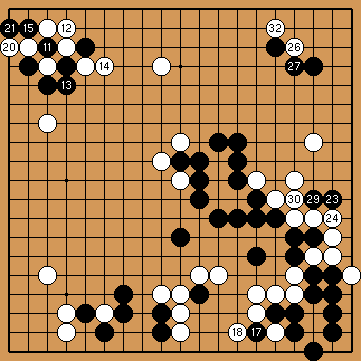
Black isn't content simply to win the ko in the top left, whence 35 to expand the fight: White isn't alive after 36. Black 51 and 53 are solid, but White 48 offers the corner a way out. The fighting resolves itself after 61, since it becomes clear that White will have to seek life in the centre before anything else. Of course White's profit in the upper right is very large.
Black 1 here is common tactic, offering to trade profit on the edge against central influence. White 2 is normally played in order to crawl next at A; but assume White 4, Black 5. White now has a choice about capturing in a ponnuki.
Playing 6 and 8 is extreme: it looks as if White is trying to deny Black anything here, on the edge or in the centre. Black would get a tremendous result by capturing and then connecting the ko.
Of course it isn't impossible for White to play this way. Regarding Black's play 1 as a middlegame joseki - one of the simplest - this variation must sometimes be considered. There is a category of plays one can classify as 'raising the stakes', to which this belongs. That concept needs further discussion, because go isn't a gambling game.
White 9 takes in the ko. White 1 forestalls Black at 2,
and also has a deeper meaning.
White sacrifices the lower left corner, in order to connect at 11, and then cut at 13 for extra profit. The balance sheet includes White's gain in territory on the lower side and Black's loss there, and White's capture in the centre.
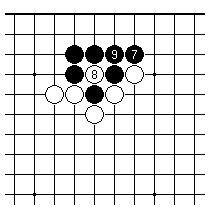
Black 2 is a play in the modern idiom, trying to make quick territory from the 4-4 point. The combination of 4 and 6 is normally thought of as a defensive technique, but here it counts as a bid for rapid development of Black's framework. Should White connect in answer to Black 10?
While connecting looks like the right play, cutting at 11 has behind it the idea of dropping back at 13, putting Black's two marked stones in shortage of liberties. White has tried this serious fight inside Black's sphere of influence quite often recently.
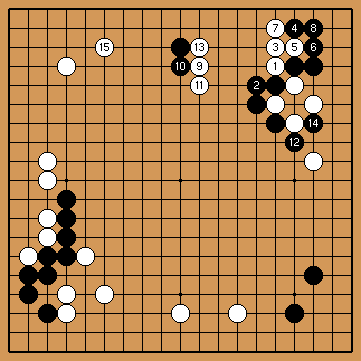
This sequence runs smoothly for White. At the end of it
White has made the black stones on the top side look
very heavy. Something remains for White to aim at on the
right, as well.
| Posted 16 July 2002. Copyright © 2002 Charles Matthews | ||
| Previous edition | Index | Next edition |