
| Go Articles |
| |
| Setpiece Kos |
Theme 5 Double hane for ko
Theme 6 The cut at the 3-2 point
Theme 7 Fighting over the 1-1 point
This article gives information on some of the common ways to start a ko that may remain hidden from an unwary opponent. How exactly to use these possibilities, when they are on the board, could be taken to be a question of timing, for a perfectionist or theoretical point of view. Or it could be treated as a pragmatic matter, as was discussed in the first section of part 6.
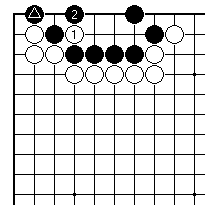
The presence here of the marked black stone means that Black can fight a ko to save this group. This sort of use of the first line stone to resist strongly is responsible for many remarkable ko tactics.
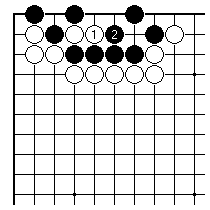
As in this case, there is normally a local ko threat for White (no point Black connecting the ko after White 1).
Naturally this idea is a big failure for Black in a case like this, with no black stone at A.
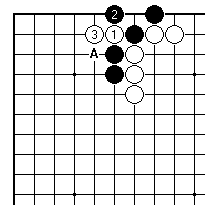
It can work in the corner, as in this case, as a highly aggressive way to play. These double hane kos are often dangerous for both players. In this situation White can extend to the 1-2 point, so that Black only has one eye in the corner.
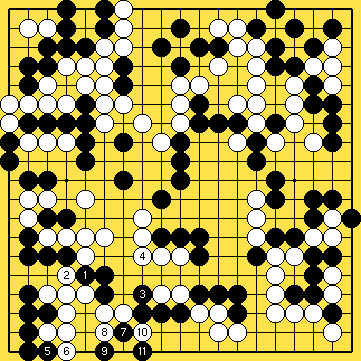
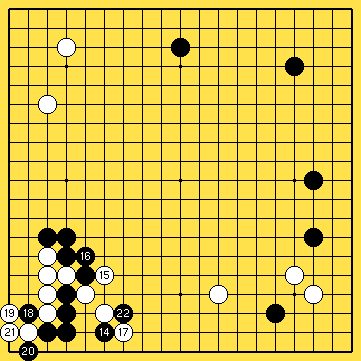
Black 7 and 9 cause shortage of liberties, as well as
setting up the ko with 11. White can't resolve this
situation by cutting through in the centre.
15, 18, 21, 24 in ko. White 16 is a local threat. The
position is clarified, with Black connecting out after 27.
In the aftermath, White has to save two groups in the centre. Black won the game by a small margin.
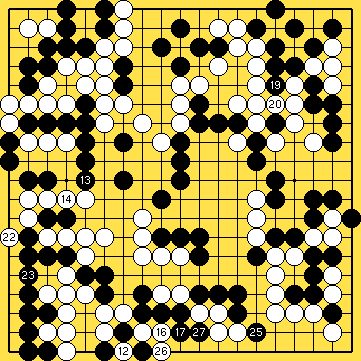
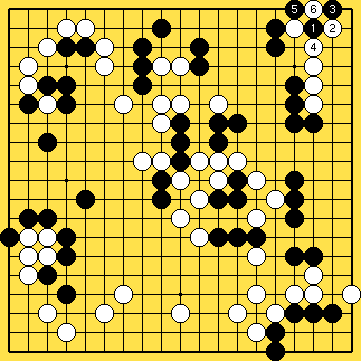
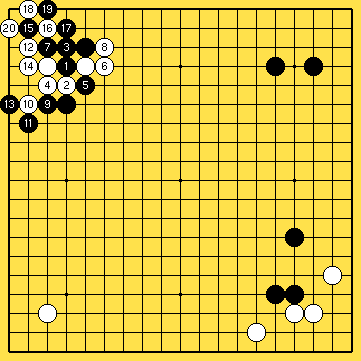
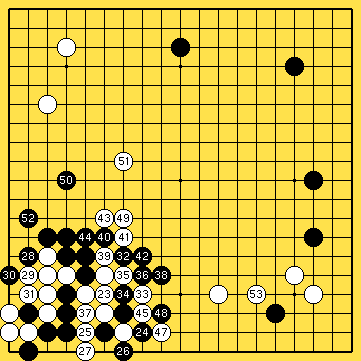
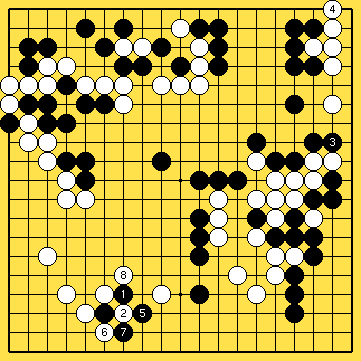
In the starting position, large-scale corner openings
in the upper left and lower right have left White with
strong influence. In this figure White begins to build
in the centre.
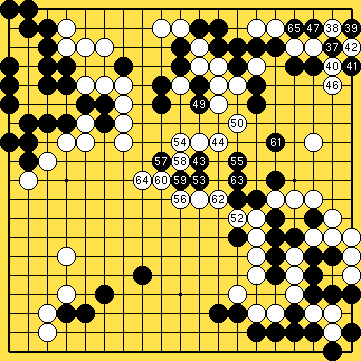
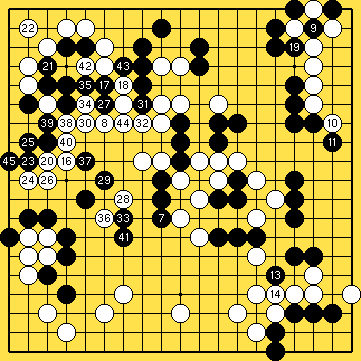
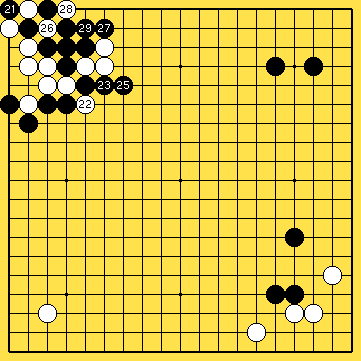
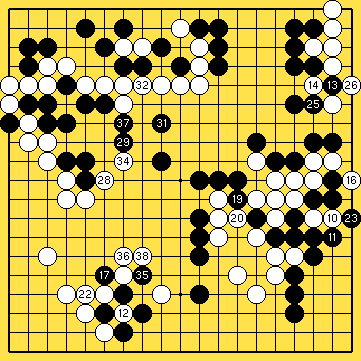
45, 48, 51 in ko. Black attacks White in the upper right
corner with the double hane. In the end White
trades it away for two plays elsewhere, although this
leaves the right side a bit thin.
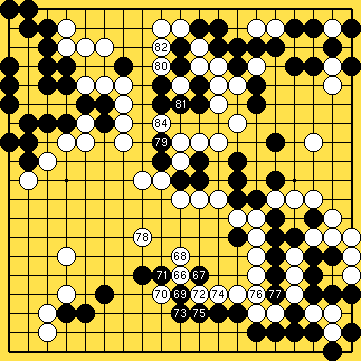
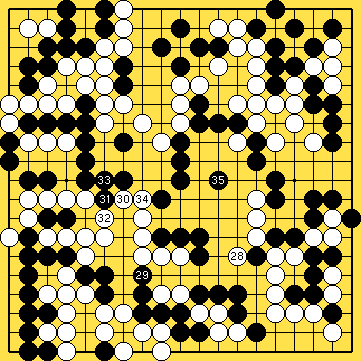
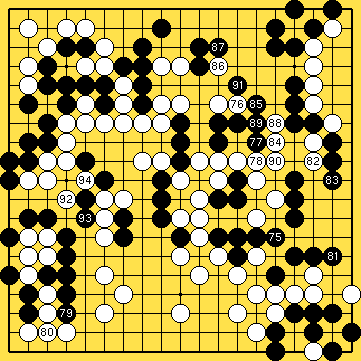
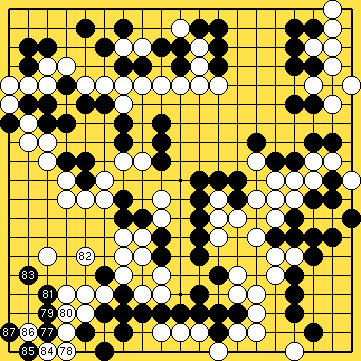
83 connects above 81. White 66 takes enough centre
profit to remain competitive. The plays 79 and so on
from Black are preparation (threat amplification) for
the attack to come on the right.
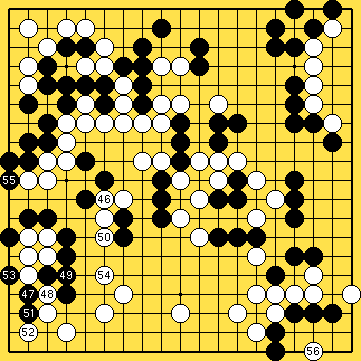
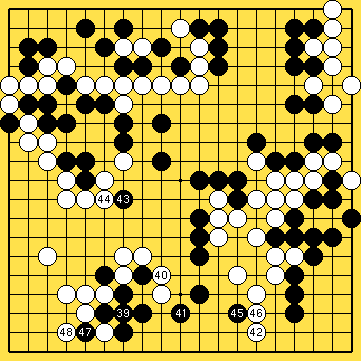
100, 103, 110, 113, 116 in ko, 118 takes four stones
(numbering restart 1 = 101). After 85 the right side
becomes ko on the edge; but Black cannot push home the
attack.
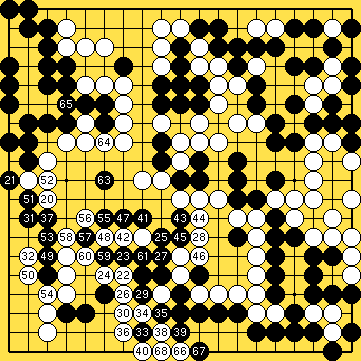
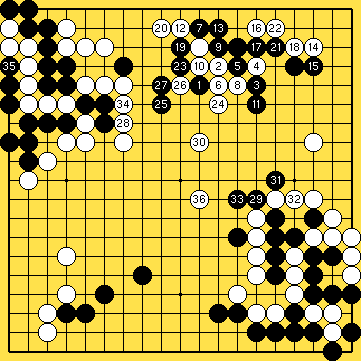
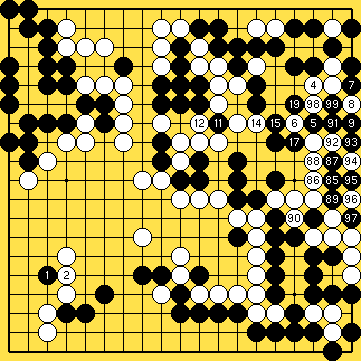
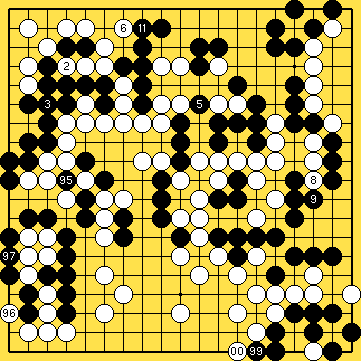
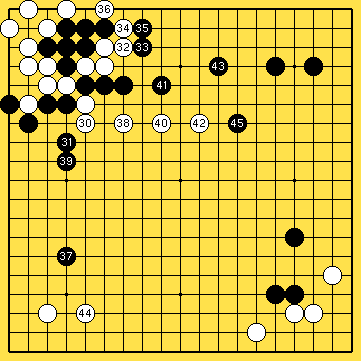
In the rest of the game White plays resolutely as Black resists the forcing play 122. Although Black makes substantial inroads in the lower left quadrant of the board, White remains comfortably ahead. Black resigns at the end of this figure.
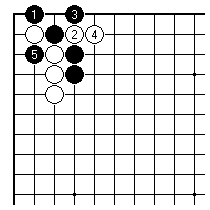
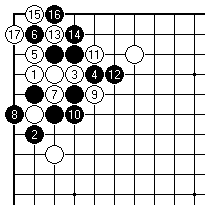
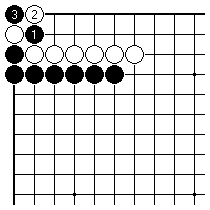
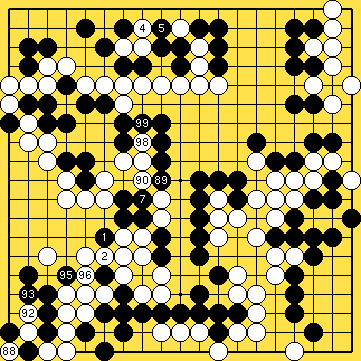
The way of starting a ko with Black 1, 3, 5 is a
hard-to-see variant on the double hane ko.
12, 15 take in the ko. Threats in the fight are mindful
of a very complex position in the left centre. Black
ignores 16, confident of survival there, but White has a
secondary attack after 28.
Black makes a profitable life on the left side, but
White cuts through in the centre, for a big trade-off.
With 56 White activates another ko.
63, 66, 69 in ko. White gives up on the lower right
corner, simply consolidating the centre with 70 and 74.
As the endgame starts, White challenges to another ko
with 94. White has threats in the top right, not even
required in the game.
98, 101, 104, 107 in ko, 112 connects ko (renumbering starts 00=100, and so on). At 111 Black has run out of good threats - no point for example threatening the bamboo joint on the right since White would answer and gain a threat too. The ko was worth around ten points. A technical point on the absence here of the 'double threat phenomenon': 102 was a good threat for White, but Black at 103 would have been too small.
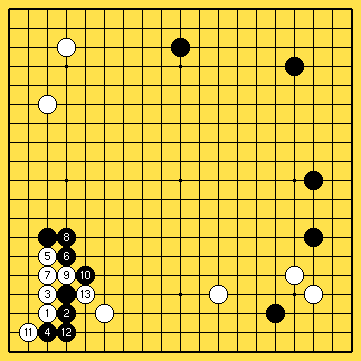
A piece of magic - something out of nothing - from a game 1907-08-19 Nozawa Chikucho-Tamura Yasuhisa (who became Honinbo Shusai the following year). White gets a ko for life in the corner, because Black resisted with 2. It's the cut 13 at the 3-2 point that makes this ko appear; any other play by White is too slow.
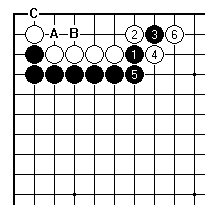
There is a characteristic endgame ko of this type, which can be aimed at early in the game by playing Black 1 and 3. Later Black A, White B, Black C set up some sort of ko; White usually has to concede something, because the presence of Black means the four white stones are in shortage of liberties.
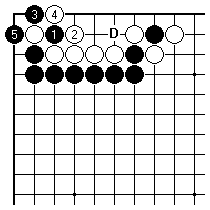
The interesting question arises now, what Black should do about D. It seems to be an ideal local ko threat. Pro games show this matter handled in different ways.
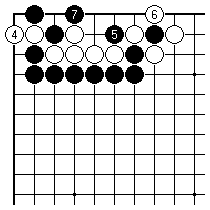
In this diagram, White plays 4 to resist to the hilt, Black plays 5 at once and then gets a bigger ko with 7.
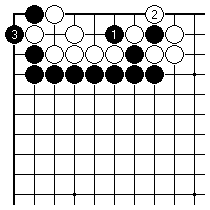
In fact a couple of examples show Cho Chikun and Sakata Eio playing atari with 1 here before starting the ko. (And in another case Nakamura-Takemiya, Black doesn't play 1 at all, but there one can see that Black would take an endgame loss of a couple of points if the ko were lost.)
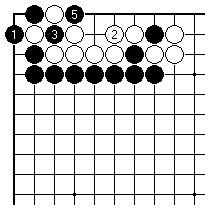
The fact is that if Black doesn't play there, White can, in which case White can concede 3 and 5 without losing very much. With a black stone at 2, the ko is more serious for White.
White 16 creates a ko in this fierce variation (White 8
is usually played at 9). White has local threats for it,
against Black 5.
24 in ko. White wins the fight in the corner.
The game has turned into a typical Sakata shinogi fight, with White having territory in the corners but needing to settle the central group.
The hane-under play Black 4 is fraught with danger.
Before this game it seems that the pros used 8 to defend
the lower cut. This is a rare instance in which White 13
is seen in high-level play.
When White answers the 3-2 cut at 19 and then 21, some
shortage of liberties has been created for the corner..
But the possibility of ko, which is definitely there
if White takes off the single stone and Black plays
21, has been erased. In this position Black has useful
local threats with the cut on the outside, played as 22.
Therefore the ko is inadvisable for White.
46 connects. Black gives up stones for outside influence: in this game it seems that White's stones on the left and lower sides are well placed to counter it.
If White doesn't connect at 1 in this typical endgame position, there is still the ko option at 2. Of course White can lose more points this way, than the five (deiri counting) or so usually at risk if you fail to connect.
Black has this local ko threat, but it isn't so good. If Black now wins the ko, not much can be done to devastate White's territory.
9 takes in ko. Black sets up a typical bulge ko, having
prepared a clean source of threats with Black 3.
15, 18, 21, 24, 27, 30, 33 take in ko. Black 17 enlarges
the ko, White 22 diminishes it again.
When Black connects with 39, the endgame starts. But
what value should one attribute to the follow-up play
Black 47?
White attacks on the lower side up to 64. Black 65,
however, is already looking to saddle White with bad aji
in the centre.
Black's clamp at 77 becomes decisive, since White
decides that to answer at 79 would be too passive. Black
gains a ko for life in the corner.
91, 94, 97, 100, 103, 106 take in ko (renumbering starts
1 = 101). White resigns after 107. Black has too many ko
threats against White's bad shape here.
| Posted 19 September 2002. Copyright (c) 2002 Charles Matthews | ||
| Previous edition | Index | Next edition |