
| Go Articles |
 | |
| Setpiece Kos |
This article complements a number of the comments made in the previous and theoretical one, during the course of a discussion of a single game. In it, a corner position set up by an early probe remains unresolved for very close to 100 plays. For much of that period neither player finds the time to settle matters, one way or the other, in a ko fight.
The background against which this ko would potentially be fought out is constantly changing. That is one point: effectively the entire middlegame is played out against the background of a ko fight in the upper left corner. A ko theorist might see that the other way round, of course: the fighting elsewhere provides the context in which one can understand why the ko is left dormant at times.
The second point is that there are different ways in which the ko might be set up, and the life-and-death situation resolved. In fact Black at times turns down a chance to live small in the corner, and also plays to enlarge the ko by reaching out towards it on the top side.
I think this example gives a good, practical illustration of the ebb-and-flow of a middlegame ko fight. One can count it as worth 20 points or so - relatively small, since the corner is of restricted size. Kobayashi Koichi as White remains very cool throughout, and indeed went on to win the game with relative ease. There is a short commentary in the Kido Yearbook, critical of Black (Kato), whose play does seem to be on the hustling, aggressive side.
The material here leads on from that covered in part 4 of this series, under Concept C.
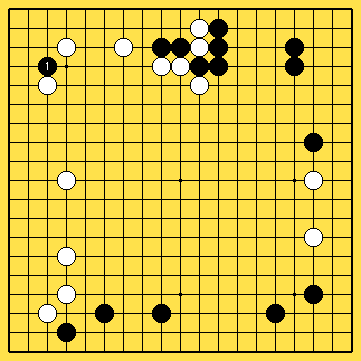
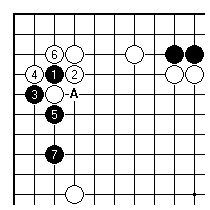
Black hopes for White 2 here in this case. Black would be able to establish a group on the side up to 7 (White 6 could instead be at A); in this case Black's formation is light and has good eye potential, taking advantage of White's fourth line stone on the left side. But the Kido Yearbook prefers Black to play directly at 7 in this diagram.
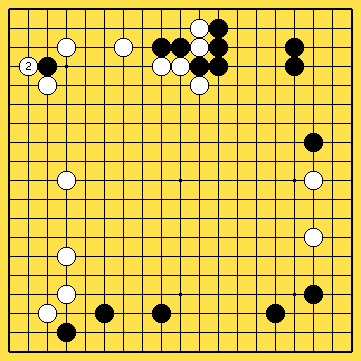
Therefore in this case it is natural for White to play this way, and to aim for an attack on Black's group in order to make forceful use of neighbouring stones.
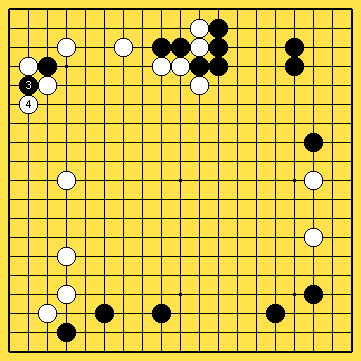
Black's expected cross-cut in order to make sabaki here.
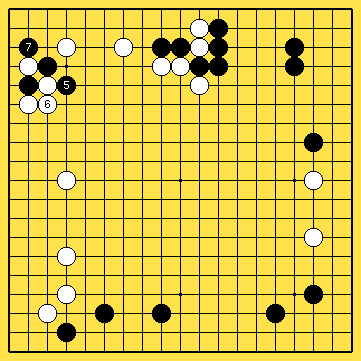
White chooses to avoid the ponnuki capture with 6; the stakes are raised somewhat. Black 7 immediately is a bold decision.
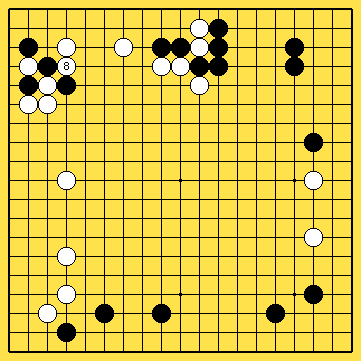
White 8 ensures that Black is directed towards life in the corner. Considering the disposition of stones on the top side, where White can be cut, and on the left where White has the 4-10 stone in place, this is a harmonious plan.
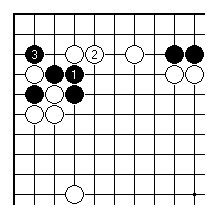
Black rejected the chance to connect before playing into the corner, but the Kido Yearbook suggests that this was unwise.
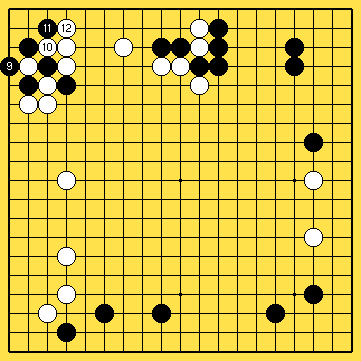
Now Black sets up a ko for life in the corner, but that poses a question, or perhaps two.
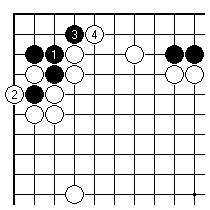
Is there anything good for Black in playing this way? As a simple life-and-death problem Black is now dead, but there is a chance of using these stones in combination with the presence on the top side. (See Concept D, Outer Strength, from part 5 of the series.)
The truth is probably that Black has already given White points on the left side in this diagram, and already needs a better result than a small corner life in gote. Therefore this is unpromising for Black.
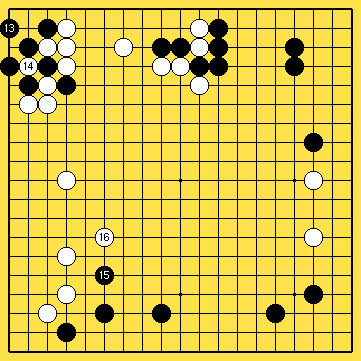
Certainly Black now rejects the chance to live small in the game variation. White's ko capture is in a sense a thick play. White permits Black to live with two points, but Black understandably walks away from that resolution of the position.
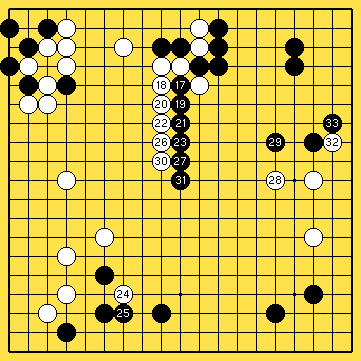
The central areas take on a more definite appearance. White 32 is the ordinary technique for stabilising a two-point extension on the side. Black 33 at this point, after Black 29 is played, is more reasonable than taking the white stone.
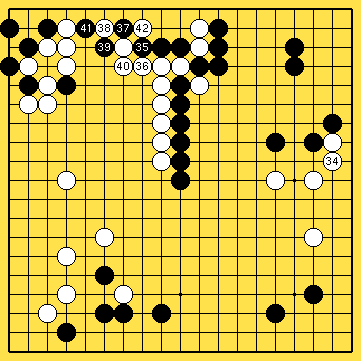
With 35 Black leaves the right side, where there remains a very large early endgame clamp for White, in order to enlarge the ko in the top left. The plays up to 41 prepare for Black's recapture in the ko. Since they cause White some shortage of liberties, the position becomes tricky. Clearly, though, they may also cost Black points.
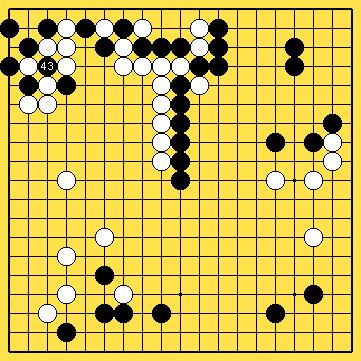
The expected revival of the ko. How can White handle the position safely?
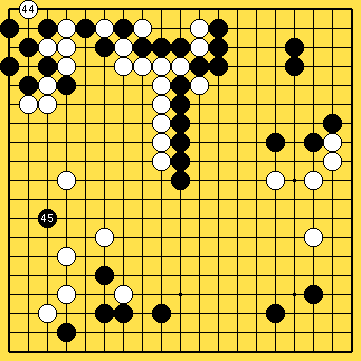
White 44 is the play mentioned in Concept C (part 4 of this series), though played with different timing and for slightly different reasons. It is a local ko threat, and also helps White towards improved shape here.
Black's response is to divert to a major fight in the lower left area. The 43/44 exchange improves Black's aji, but of course the situation on the top side has been left hanging.
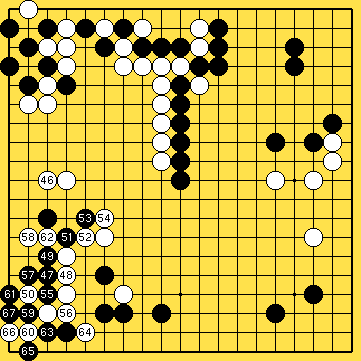
Black does well, living in the lower left corner, while conceding influence to White.
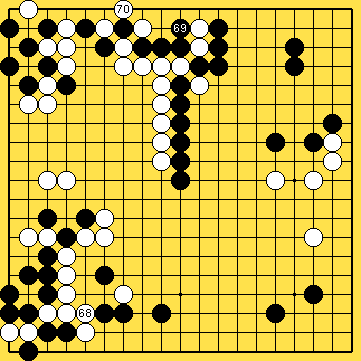
Black ends in sente. Returning to 69 to tidy up signifies that Black places a lower value now on the ko in the upper left. Black may have intended to use it during the fight in the previous diagram, if White had tried to kill the invasion. That is like miai thinking - Black hopes to live either in the lower left or in the upper left. The ko fight at that stage would need to be larger, but no more.
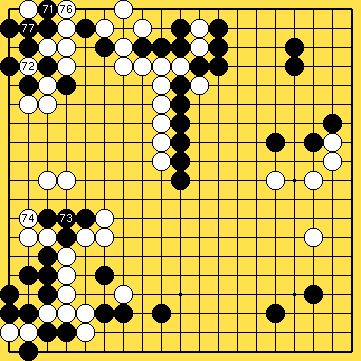
Black makes the group in the upper left alive in ko, but in gote - White could have killed it with one more play.
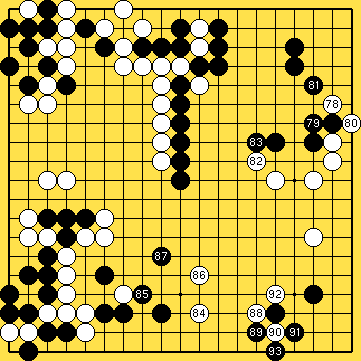
But White intermits this fight, taking the large point on the right left more than forty moves ago. With 84 White presents a winning plan - live on the lower side, backed up by the strength to the left.
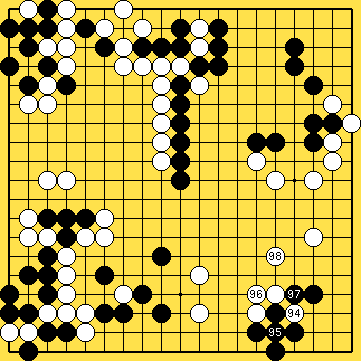
Black tamely connects with 95 - this is a no-contest ko as explained in part 4 (in fact it's the very example there, obtained by a transposed order of plays). With 98 White is ready to wrap up victory.
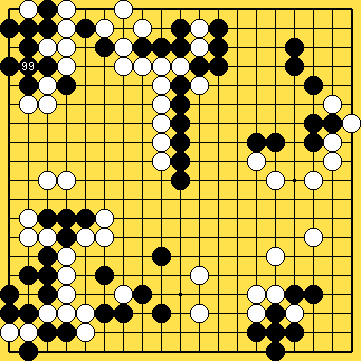
Black closes down the ko, at last. White went on to win by 6.5 points.
| Posted 21 October 2002. Copyright (c) 2002 Charles Matthews | ||
| Previous edition | Index |