
| Go Articles |
| |
| Setpiece Kos |
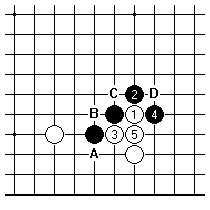
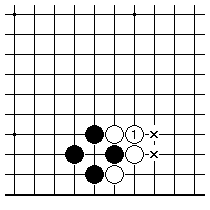
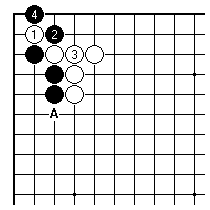
By bulge ko we mean a ko set up by a bulge play (Japanese fukure), followed by an atari and a deliberate choice of ko rather than solid connection.
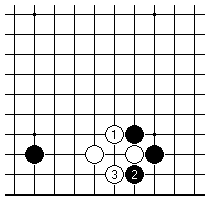
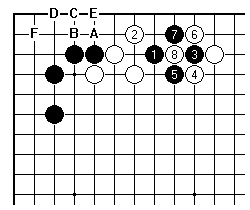
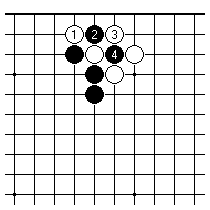
Here White 1 is the bulge play, Black 2 is natural to attack White's eye shape, and White 3 is the characteristic play of the bulge ko, a flexible defence. It is worth pointing out that the ko is created with minimum material. That will be all to the good if White subsequently loses it.
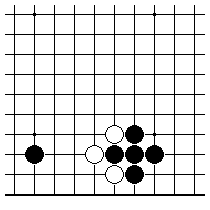
Looking ahead, Black by capturing the ko and then connecting solidly can get a good local result.
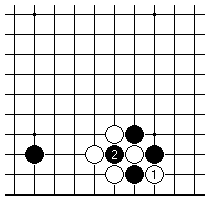
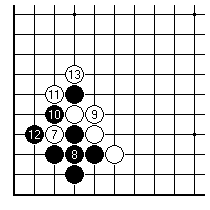
White's aim may be to ignore one black ko threat, to set up this second-phase ko.
Then by winning the ko once more, White can obtain this result, making a vast change in middlegame terms by settling a weak group and severely weakening Black.

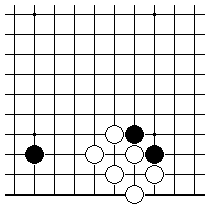
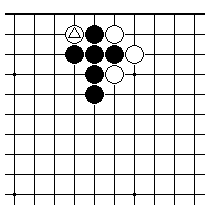
Such kos are an important defensive option in fighting. For example in this case Black 2 should sometimes be played at A instead, to prevent the bulge ko manoeuvre of 3 and 5.

The idea of Black 3 is to play lightly in White's area
of strong influence. Black is prepared to sacrifice
these stones.
14 in ko. Black cuts through in the centre, consistent strategy. But there is still much fighting to come there.
Naturally one shouldn't always pursue a ko fight simply because the opponent offers the chance of one.
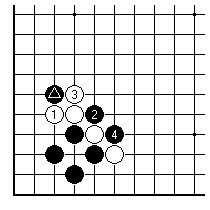
For example here the idea of White 3 isn't to fight a bulge ko, but to connect at 5 if Black 4 is played. White will have the choice of tactics at A, B, C or D next, so making apparent bad shape is normally quite justified.
The low connection Black 1 here may seem natural to limit White's possibilities, but there are problems. Firstly it concedes influence: one now expects White to develop easily towards the centre. Secondly Black is probably giving up on fighting the ko for the time being. Capturing now in the ko and then connecting will make Black 1 look like a wasted stone (bad in terms of the tally counting introduced in the previous article).
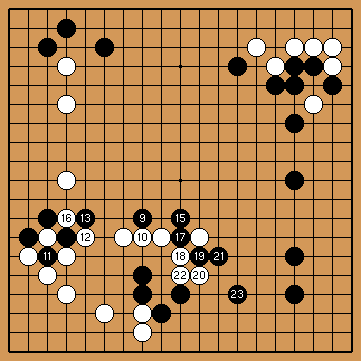
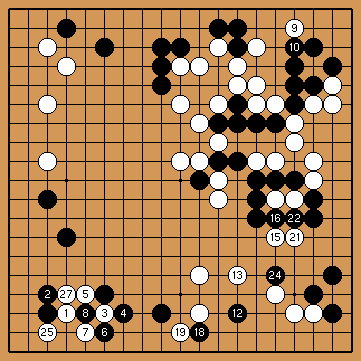
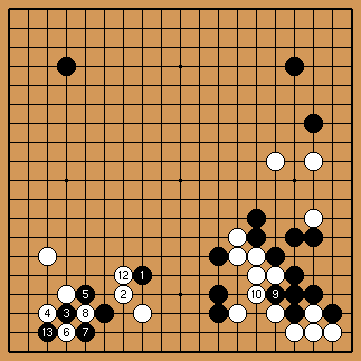
White sets up a ko (11 takes ko), Black 12 is typically
too much of a concession. Here Black wants to take
profit from White's threat at 9.

Black does succeed in taking profit in the lower right corner, by backing down in the centre. Black 34 sets off a major struggle for eye shape, in the course of which Black obtains safety and prevents White from dominating the centre.
One is more likely to see the defender (the player who set up the bulge ko to handle a weak group) connect at 1, as long as it has an effect on stones at the 'x' points.
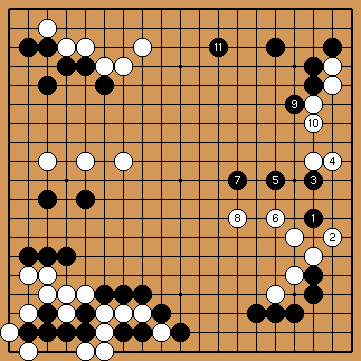
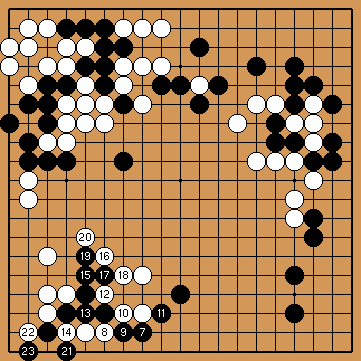
11,14,17,20,23,26 in ko. With 24 Black is beginning to
look to take points, rather than launch a killing attack
on the white group in the lower left.
Black 30 sets off an odd-looking sequence, as Black apparently shows restraint in the centre and gives away points. The aim must be indirect attack on White. 52 in ko. Eventually White lives definitely with 61, and the endgame starts. White won this game.
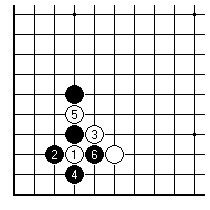
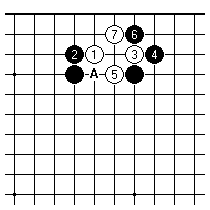
A final option for declining a bulge ko is the counter-atari play, for example White 5 here.
This continuation is dependent on the ladder with 13. Normally Black must simply connect with 8, as White could gain hugely by fighting and winning a ko here.
The counter-atari plan is very sensitive to the exact placing of stones. If Black has the marked stone instead (knight's move rather than one-point jump) White 1 is less attractive, because of Black 2 and so on.
This pattern is one of a number aiming to exploit the loose connection made by the two-point extension on the fourth line.
Black 2 could of course be at A to emphasise influence: when Black tries to defend territory this way, White has the option of a contact play at 3 to cause trouble (cf. the Ishida-Cho game above)
14,17 in ko. White 18 indicates a powerful plan to capture Black outright.
23, 28 in ko; 29 connects at 26. It is a reading exercise to see that Black cannot live in the upper left, beciase of the effect of white stones in the centre.
There is a ko implicit in one of the most common of all joseki (attach-draw back, tsukehiki in Japanese). Although one should definitely know about it, handling it in real game situations can be considered a matter of fighting power, and initiating this sequence should be a matter of serious consideration becuase of the possible downside losses.
This is the basic variation (White 4 and 6 might be interchanged). If White finishes this ko by connecting, Black has suffered a loss of territory (in the corner, after White A etc.), and of aji - reduction plays round here will have diminished effect. White might also play at B, rather than connecting: that attempts to capture Black on a larger scale, but is evidently somewhat less secure.
If Black wins the ko twice to get this result, that is obviously very large. Quite how big will depend on an evaluation of the weakness of White's groups. On a normal reckoning my opponent's weak group is worth 10-20 points for me. Considering the destruction of White's initial territory, winning the ko this way ought to be worth at least 40 points for Black, sometimes 50. White of course has had two threats elsewhere ignored, and has sente to follow up one of those.
While Black has done very well locally, the overall result cannot so often be expected to be favourable.

As soon as White answers Black 1 at 2, Black is able
to kill White in the upper right. Evidently White had
prepared for the ko fight with 10 etc.
23,26,29,32 in ko. Up to 48 White has an influential position, and went on to win.
White 4 prevents ko, and White now puts faith in central
attack. Black 11, while a typical Rin play, is thought
to be inferior to buttressing the central group.
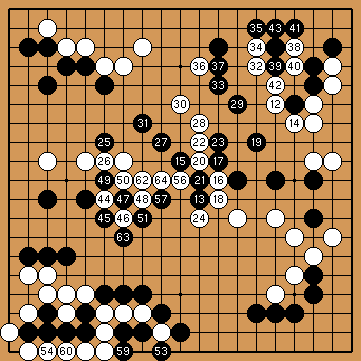
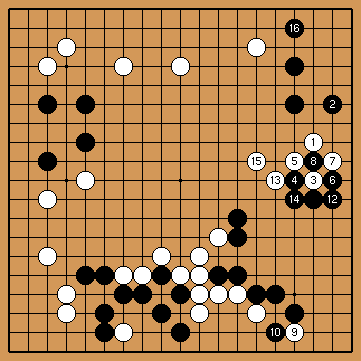
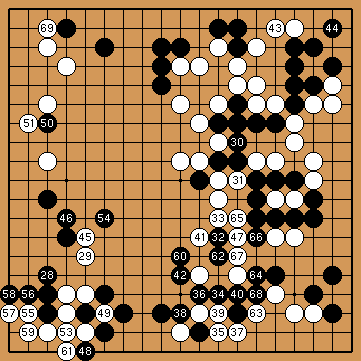
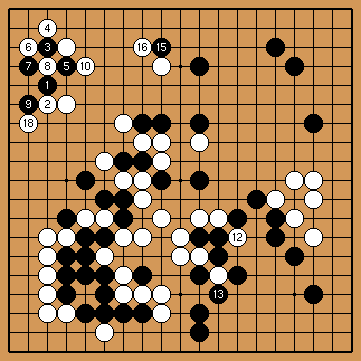
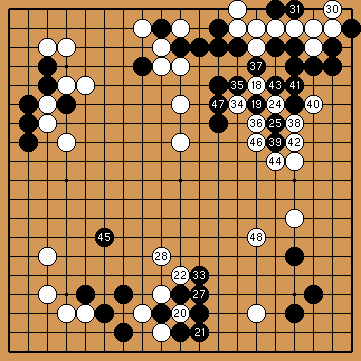
White first takes profit in the upper right. Black resists with ko at 51, as White tries to settle the left-side weak group. 52,55,58 in ko. When White connects out at 64 the position has become level. An example of Fujisawa's skill as a practical player.
If Black is reluctant to initiate a bulge ko, White 1 here forces the issue.
If however Black wins that ko, the marked white stone becomes a pure loss. Therefore White employs this tactic with great care. Reasons White may still use it, when the ko will be lost, include (a) converting aji in this area to action in another, and (b) fixing shapes in preference to playing a fluid game. These might be two sides of the same coin.
In this sort of position White may well be playing by shape, and declines ko by connecting solidly; the aim is at the point A.
11 in ko. Black 15 leads to a big exchange.

16 connects ko. 19 connects. Black provoked the ko in order to land White with weak groups in the lower right, an attacking plan. White, however, sacrifices stones to build up outside influence for the later fight on the left side. Note that the life and death of the lower right corner, at nearly 30 points, is still below the threshold at which it would command the players' attention.
White 6 clearly wants to rob Black of eyes without use
of ko. White's idea must be to bring this attack into
relation with the unfinished business of the weak black
group on the left side.
It becomes ko after Black 23, with Black having good
local threats. 27 in ko, 33 connects ko.
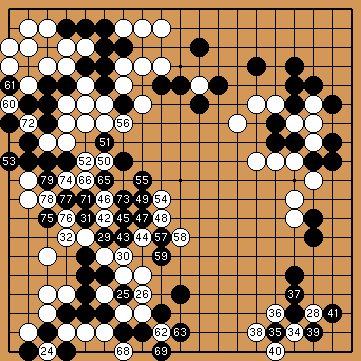
White attacks with ko at 60. 64, 67, 70 take ko. White trades away one group in order to capture Black. But Black 79 implies the group isn't properly captured - there will be a further ko here. At that point White resigned. Black certainly has threats on the lower side.
| Posted 3 July 2002. Copyright © 2002 Charles Matthews | ||
| Previous edition | Index | Next edition |